Showing posts with label red. Show all posts
Wednesday, April 24, 2013

Work Friendly Wednesday: OPI Keys to my Karma and MAC Ruby Woo

The one bright colour that is universally acceptable to wear to work is red. I'm not a huge fan of red - I think it's just a bit too plain and commonplace. But I do wear it sometimes to match with an outfit or FOTD. Today I'm matching OPI Keys to my Karma to one of my favourite red lipsticks, MAC Ruby Woo.

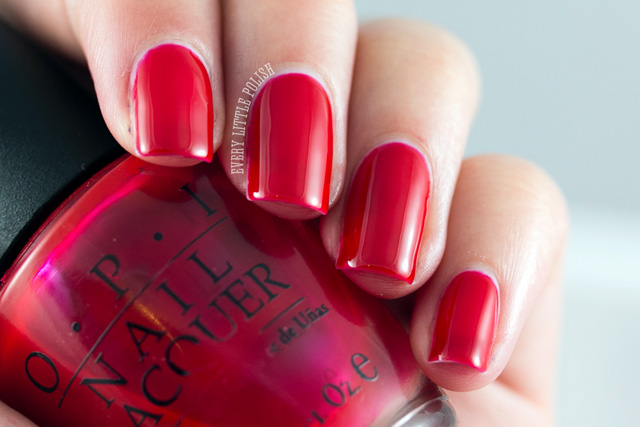
OPI Keys to my Karma is a blue-toned red with a jelly-like finish. It's more opaque than a jelly, but has a squishier look than a straight up creme. Because of this, it dries really shiny - the swatch below is without topcoat. I used 3 coats.


MAC Ruby Woo is a blue-toned matte red lipstick. This is the most matte lipstick in MAC's line, and because of this it's very drying, and drags upon application. However, it's so pigmented that I can apply a dab of lip balm on top without worrying about the colour coming off. This is well known as a cult red that looks great on everyone.


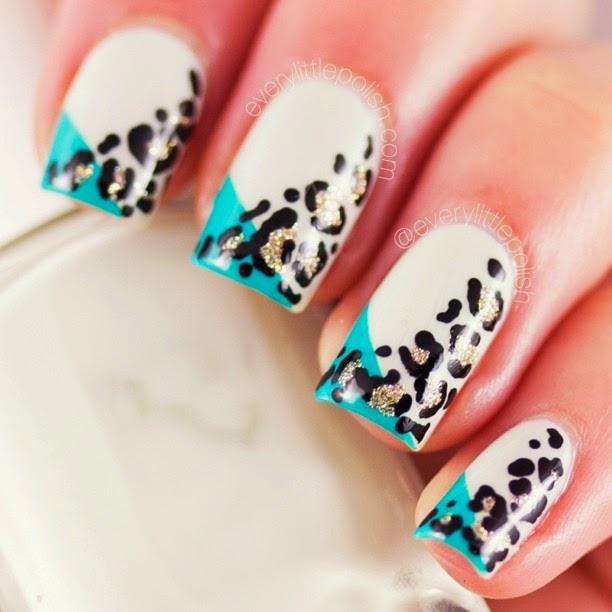
What do you think of the matching lip and nail combo? Do you match your nails to your makeup?
Sunday, March 24, 2013

Disney Princess Challenge: Snow White

This week's theme for the Disney Princess Challenge is Snow White. I was never really into Snow White unfortunately... And I struggled to be really inspired for this theme, so my attempt is a bit half-hearted. On the other hand I've been wanting to try this style of dotting for ages so this was the perfect opportunity.

I used Pretty Serious BSOD, OPI Red and Rimmel Lemon Drop. I'm still obsessed with the OPI Matte Top Coat so I couldn't resist mattifying this. I love the smooth look!


Check out the other girls who are taking part in the Disney Princess Challenge: 
Tuesday, March 19, 2013

Louboutin Nails with OPI Matte Top Coat

Today's nails are very simple, but classic. They're inspired by my Louboutins. I bought myself a pair of Very Prive 120s as a graduation present at the end of last year. I paid full Australian RRP because the classic styles are really hard to find overseas online, but I am so happy with them. I know it's hard to justify paying that much for a shoe just because it's a certain brand, but a) I'm a label whore and b) they're comfy (for 12cm heels), well-made and look freaking amazing.

I was also lucky enough to get my hands on a bottle of OPI's new Matte Top Coat for this mani. I've been dying to try a matte top coat for ages, but I never got around to actually buying Essie Matte About You, the one with the best reviews so far. Now that I've tried the OPI one I don't think I'll need to try any other brands. It dries in seconds and it has a really flat, matte finish. I know the matte look has been around for a while now but I love it. I don't know if I'll ever get sick of it!


A few tips for applying matte top coat that I've discovered while doing this mani:
  • The thing about matte top coats is that they show every imperfection in the nail, as you can see in the photos above. Next time I'll buff my nails and use a ridge-filling base coat. 
  • Matte top coats aren't as forgiving in terms of self-levelling as Seche Vite, so make sure you apply a nice thick coat. I found that it dried just as quickly as a thin coat, but without any patchiness.
  • I used two thick coats for this mani. I think it gives a smoother finish. I waited for the first coat to dry before applying the second.
  • It might even be worth trying the matte top coat over Seche Vite, after it has completely dried. This might help to get a smooth finish. I'll try it and update this post with the results.

Are you a fan of matte nails?

LinkWithin

Related Posts Plugin for WordPress, Blogger...