I just wanted to emphasise that the intention of these posts is to show my personal workflow. I'm no expert, but I've gone through a lot of trial and error to find something that works for me personally. I want to share my workflow to hopefully save others a bit of time in finding a process that works for them as well.
Lightboxes for Nail Polish Photography
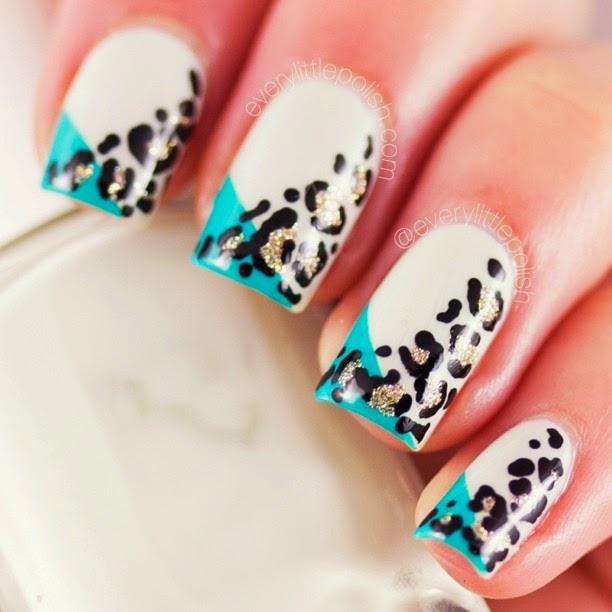
Many people in the nail blogging community use lightboxes in their nail photography. A lightbox is simply a box with translucent white panels which soften light, so it gets rid of harsh reflections off your nails. It also allows you to capture reflective details such as glitter and individual shimmer particles that would normally be lost with direct lighting.
 |
| Left: Direct Lighting, Right: Lightbox |
Lightbox

I use a 30x30x30cm lightbox/softbox/light tent that I bought from ebay. I find 30cm is a good size for taking photos of my nails, and it's not so big that it takes up too much space.
 |
| My hand inside the lightbox to show the relative size |
Backdrops
The lightbox I bought came with a white, black, red and blue backdrop, but I only use the white one. It's made of a soft faux-velvety kind of material that's supposed to diffuse light and reflections, but it gets quite wrinkly when you fold it up for storage. However, the wrinkles aren't really an issue for me because I:
a) Crop my photos close to my nails so you can't see much of the background
b) Adjust the exposure in post production. When you brighten the background, it gets rid of the wrinkles.
In my post production post, I will show you a few different ways that I get the background as smooth as possible. Alternatively, if you need a crisp white background for taking photos of products and prefer not to edit in post, you can light it from behind with a third lamp.
Some other good backdrop materials that don't wrinkle are posterboard, thick drafting paper, or white velvet. Make sure your backdrop is curved at the bottom, so there is no defined edge or corner. This creates that seamless white background.
 |
| You can see the curved backdrop clearly in this DIY light box (Image source: http://www.makeuptalk.com/beautyblog/how-to-make-an-inexpensive-light-tent-diy/) |
DIY
I won't go into detail about building your own lightbox in this post, as I haven't personally done it myself. But this tutorial is a good one to follow. Essentially, you want to cut holes in the sides of a box and cover the holes with tracing paper to get that diffused light effect.
Lights
I use two 5500k lights, one on each side. I started out using 55w bulbs, but my boyfriend dropped one and smashed it, so I bought 85w bulbs to replace them. One of the main problems I had with the 55w bulbs was that the picture would be dull and dark, but that problem has been eliminated with brighter lights. I bought these lamps and bulbs from an Australian seller on ebay, and you can find similar ones here.
When looking for a bulb, look for one labelled "cool daylight". These 5500k lights are not true daylight (true daylight bulbs have a blue cast), but these are close enough to a neutral white for me.
 |
| My lighting setup |
 |
| Left: Lit from behind, Right: Lit from front |
The most important thing is to use lights that are bright enough, and don't be afraid to use more if you need to.
Next post I'll be looking at how I actually take my photos, with both a point and shoot and SLR. As always, if you have any questions or tips of your own just comment below or shoot me an email at everylittlepolish@gmail.com. Thanks for reading!


0 comments:
Post a Comment